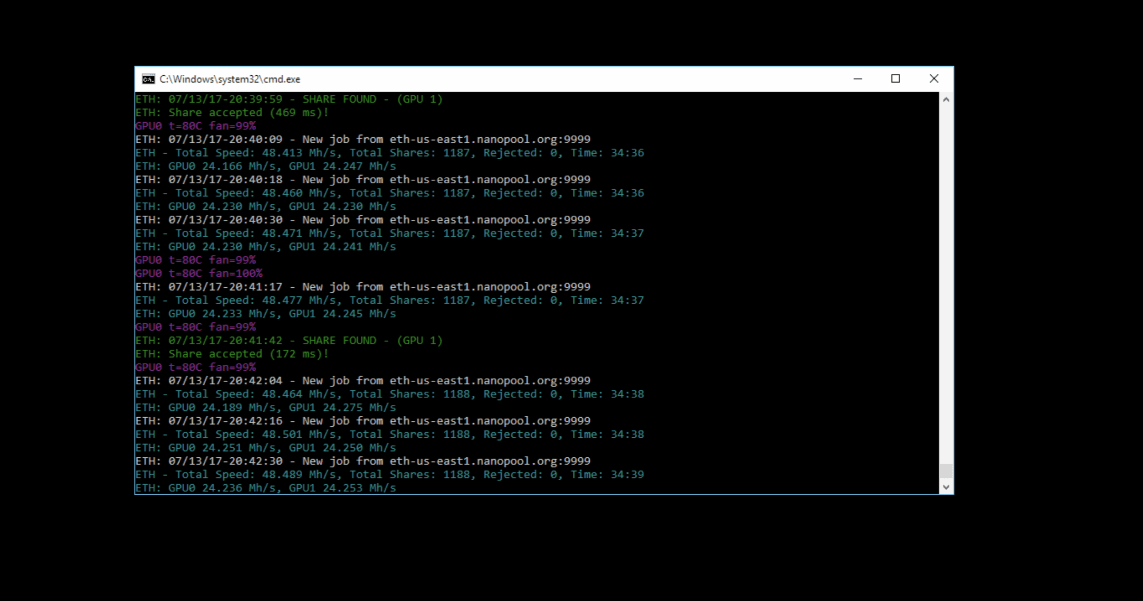
If you’ve been mining with Claymore’s for a while now, you might have realized that the program is far more powerful than you thought. While it’s easy to get it set up and running initially as we detailed in our full Claymore’s guide, it also has an extensive number of parameters that can control everything from the time between HTTP requests to target GPU temperatures — all from the command line.
From the program’s Readme.txt, here’s the full list of Claymore’s command line options:
-epool Ethereum pool address. Only Stratum protocol is supported for pools. Miner supports all pools that are compatible with Dwarfpool proxy and accept Ethereum wallet address directly. For solo mining, specify “http://” before address, note that this mode is not intended for proxy or HTTP pools, also “-allpools 1” will be set automatically in this mode. Note: The miner supports all Stratum versions for Ethereum, HTTP mode is necessary for solo mining only. Using any proxies will reduce effective hashrate by at least 1%, so connect miner to Stratum pools directly. Using HTTP pools will reduce effective hashrate by at least 5%.
-ewal Your Ethereum wallet address. Also worker name and other options if pool supports it. Pools that require “Login.Worker” instead of wallet address are not supported directly currently, but you can use “-allpools 1” option to mine there.
-epsw Password for Ethereum pool, use “x” as password.
-eworker Worker name, it is required for some pools.
-esm Ethereum Stratum mode. 0 - eth-proxy mode (for example, dwarpool.com), 1 - qtminer mode (for example, ethpool.org), 2 - miner-proxy mode (for example, coinotron.com), 3 - nicehash mode. 0 is default.
-etha Ethereum algorithm mode for AMD cards. 0 - optimized for fast cards, 1 - optimized for slow cards, 2 - for gpu-pro Linux drivers. -1 - autodetect (default, automatically selects between 0 and 1). You can also set this option for every card individually, for example “-etha 0,1,0”.
-asm (AMD cards only) enables assembler GPU kernels. In this mode some tuning is required even in ETH-only mode, use “-dcri” option or or “+/-” keys in runtime to set best speed. Currently ETH-LBRY mode is not supported in assembler. Specify “-asm 0” to disable this option. You can also specify values for every card, for example “-asm 0,1,0”. Default value is “1”. If ASM mode is enabled, miner must show “GPU #x: algorithm ASM” at startup. Check “FINE-TUNING” section below for additional notes. NEW: added alternative assembler kernels for Tonga and Polaris cards for ETH-only mode. Use them if you get best speed at “-dcri 1” (i.e. you cannot find speed peak), use “-asm 2” option to enable this mode.
-ethi Ethereum intensity. Default value is 8, you can decrease this value if you don’t want Windows to freeze or if you have problems with stability. The most low GPU load is “-ethi 0”. Also “-ethi” now can set intensity for every card individually, for example “-ethi 1,8,6”. You can also specify negative values, for example, “-ethi -8192”, it exactly means “global work size” parameter which is used in official miner.
-eres this setting is related to Ethereum mining stability. Every next Ethereum epoch requires a bit more GPU memory, miner can crash during reallocating GPU buffer for new DAG. To avoid it, miner reserves a bit larger GPU buffer at startup, so it can process several epochs without buffer reallocation. This setting defines how many epochs miner must foresee when it reserves GPU buffer, i.e. how many epochs will be processed without buffer reallocation. Default value is 2.
-allpools Specify “-allpools 1” if miner does not want to mine on specified pool (because it cannot mine devfee on that pool), but you agree to use some default pools for devfee mining. Note that if devfee mining pools will stop, entire mining will be stopped too.
-allcoins Specify “-allcoins 1” to be able to mine Ethereum forks, in this mode miner will use some default pools for devfee Ethereum mining. Note that if devfee mining pools will stop, entire mining will be stopped too. Miner has to use two DAGs in this mode - one for Ethereum and one for Ethereum fork, it can cause crashes because DAGs have different sizes. Therefore for this mode it is recommended to specify current Ethereum epoch (or a bit larger value), for example, “-allcoins 47” means that miner will expect DAG size for epoch #47 and will allocate appropriate GPU buffer at starting, instead of reallocating bigger GPU buffer (may crash) when it starts devfee mining. Another option is to specify “-allcoins -1”, in this mode miner will start devfee round immediately after start and therefore will get current epoch for Ethereum, after that it will be able to mine Ethereum fork. If you mine Expanse, the best way is to specify “-allcoins exp”, in this mode devfee mining will be on Expanse too and DAG won’t be recreated at all. If you mine ETC on some pool that does not accept wallet address but requires Username.Worker instead, the best way is to specify “-allcoins etc”, in this mode devfee mining will be on ETC pools and DAG won’t be recreated at all.
-etht Time period between Ethereum HTTP requests for new job in solo mode, in milliseconds. Default value is 200ms.
-erate send Ethereum hashrate to pool. Default value is “1”, set “-erate 0” if you don’t want to send hashrate.
-estale send Ethereum stale shares to pool, it can increase effective hashrate a bit. Default value is “1”, set “-estale 0” if you don’t want to send stale shares.
-dpool Decred/Siacoin/Lbry/Pascal pool address. Use “http://” prefix for HTTP pools, “stratum+tcp://” for Stratum pools. If prefix is missed, Stratum is assumed. Decred: both Stratum and HTTP are supported. Siacoin: both Stratum and HTTP are supported, though note that not all Stratum versions are supported currently. Lbry: only Stratum is supported.
-dwal Your Decred/Siacoin/Lbry/Pascal wallet address or worker name, it depends on pool.
-dpsw Password for Decred/Siacoin/Lbry/Pascal pool.
-di GPU indexes, default is all available GPUs. For example, if you have four GPUs “-di 02” will enable only first and third GPUs (#0 and #2). You can also turn on/off cards in runtime with “0”…”9″ keys and check current statistics with “s” key.
-gser this setting can improve stability on multi-GPU systems if miner hangs during startup. It serializes GPUs initalization routines. Use “-gser 1” to serailize some of routines and “-gser 2” to serialize all routines. Default value is “0” (no serialization, fast initialization).
-mode Select mining mode: “-mode 0” (default) means dual Ethereum + Decred/Siacoin/Lbry mining mode. “-mode 1” means Ethereum-only mining mode. You can set this mode for every card individually, for example, “-mode 1-02” will set mode “1” for first and third GPUs (#0 and #2).
-dcoin select second coin to mine in dual mode. Possible options are “-dcoin dcr”, “-dcoin sc”, “-dcoin lbc”, “-dcoin pasc”. Default value is “dcr”.
-dcri Decred/Siacoin/Lbry/Pascal intensity, or Ethereum fine-tuning value in ETH-only ASM mode. Default value is 30, you can adjust this value to get the best Decred/Siacoin/Lbry mining speed without reducing Ethereum mining speed. You can also specify values for every card, for example “-dcri 30,100,50”. You can change the intensity in runtime with “+” and “-” keys and check current statistics with “s” key. For example, by default (-dcri 30) 390 card shows 29MH/s for Ethereum and 440MH/s for Decred. Setting -dcri 70 causes 24MH/s for Ethereum and 850MH/s for Decred.
-dcrt Time period between Decred/Siacoin HTTP requests for new job, in seconds. Default value is 5 seconds.
-ftime failover main pool switch time, in minutes, see “Failover” section below. Default value is 30 minutes, set zero if there is no main pool.
-wd watchdog option. Default value is “-wd 1”, it enables watchdog, miner will be closed (or restarted, see “-r” option) if any thread is not responding for 1 minute or OpenCL call failed. Specify “-wd 0” to disable watchdog.
-r Restart miner mode. “-r 0” (default) - restart miner if something wrong with GPU. “-r -1” - disable automatic restarting. -r >20 - restart miner if something wrong with GPU or by timer. For example, “-r 60” - restart miner every hour or when some GPU failed. “-r 1” closes miner and execute “reboot.bat” file (“reboot.bash” or “reboot.sh” for Linux version) in the miner directory (if exists) if some GPU failed. So you can create “reboot.bat” file and perform some actions, for example, reboot system if you put this line there: “shutdown /r /t 5 /f”.
-minspeed minimal speed for ETH, in MH/s. If miner cannot reach this speed for 5 minutes for any reason, miner will be restarted (or “reboot.bat” will be executed if “-r 1” is set). Default value is 0 (feature disabled).
-retrydelay delay, in seconds, between connection attempts. Default values is “20”. Specify “-retrydelay -1” if you don’t need reconnection, in this mode miner will exit if connection is lost.
-dbg debug log and messages. “-dbg 0” - (default) create log file but don’t show debug messages. “-dbg 1” - create log file and show debug messages. “-dbg -1” - no log file and no debug messages.
-logfile debug log file name. After restart, miner will append new log data to the same file. If you want to clear old log data, file name must contain “noappend” string. If missed, default file name will be used.
-nofee set “1” to cancel my developer fee at all. In this mode some optimizations are disabled so mining speed will be slower by about 4%. By enabling this mode, I will lose 100% of my earnings, you will lose only 2-3% of your earnings. So you have a choice: “fastest miner” or “completely free miner but a bit slower”. If you want both “fastest” and “completely free” you should find some other miner that meets your requirements, just don’t use this miner instead of claiming that I need to cancel/reduce developer fee, saying that 1-2% developer fee is too much for this miner and so on.
-benchmark benchmark mode, specify “-benchmark 1” to see hashrate for your hardware. You can also specify epoch number for benchmark, for example, “-benchmark 110”.
-li low intensity mode. Reduces mining intensity, useful if your cards are overheated. Note that mining speed is reduced too. More value means less heat and mining speed, for example, “-li 10” is less heat and mining speed than “-li 1”. You can also specify values for every card, for example “-li 3,10,50”. Default value is “0” - no low intensity mode.
-lidag low intensity mode for DAG generation, it can help with OC or weak PSU. Supported values are 0, 1, 2, 3, more value means lower intensity. Example: “-lidag 1”. You can also specify values for every card, for example “-lidag 1,0,3”. Default value is “0” (no low intensity for DAG generation).
-ejobtimeout job timeout for ETH, in minutes. If miner does not get new jobs for this time, it will disconnect from pool. Default value is 10.
-djobtimeout job timeout for second coin in dual mode, in minutes. If miner does not get new jobs for this time, it will disconnect from pool. Default value is 30.
-tt set target GPU temperature. For example, “-tt 80” means 80C temperature. You can also specify values for every card, for example “-tt 70,80,75”. You can also set static fan speed if you specify negative values, for example “-tt -50” sets 50% fan speed. Specify zero to disable control and hide GPU statistics. “-tt 1” (default) does not manage fans but shows GPU temperature and fan status every 30 seconds. Specify values 2..5 if it is too often. Note: for NVIDIA cards only temperature monitoring is supported, temperature management is not supported. Note: for Linux gpu-pro drivers, miner must have root access to manage fans, otherwise only monitoring will be available.
-ttdcr reduce Decred/Siacoin/Lbry/Pascal intensity automatically if GPU temperature is above specified value. For example, “-ttdcr 80” reduces Decred intensity if GPU temperature is above 80C. You can see current Decred intensity coefficients in detailed statistics (“s” key). So if you set “-dcri 50” but Decred/Siacoin intensity coefficient is 20% it means that GPU currently mines Decred/Siacoin at “-dcri 10”. You can also specify values for every card, for example “-ttdcr 80,85,80”. You also should specify non-zero value for “-tt” option to enable this option. It is a good idea to set “-ttdcr” value higher than “-tt” value by 3-5C.
-ttli reduce entire mining intensity (for all coins) automatically if GPU temperature is above specified value. For example, “-ttli 80” reduces mining intensity if GPU temperature is above 80C. You can see if intensity was reduced in detailed statistics (“s” key). You can also specify values for every card, for example “-ttli 80,85,80”. You also should specify non-zero value for “-tt” option to enable this option. It is a good idea to set “-ttli” value higher than “-tt” value by 3-5C.
-tstop set stop GPU temperature, miner will stop mining if GPU reaches specified temperature. For example, “-tstop 95” means 95C temperature. You can also specify values for every card, for example “-tstop 95,85,90”. This feature is disabled by default (“-tstop 0”). You also should specify non-zero value for “-tt” option to enable this option. If it turned off wrong card, it will close miner in 30 seconds. You can also specify negative value to close miner immediately instead of stopping GPU, for example, “-tstop -95” will close miner as soon as any GPU reach 95C temperature.
-fanmax set maximal fan speed, in percents, for example, “-fanmax 80” will set maximal fans speed to 80%. You can also specify values for every card, for example “-fanmax 50,60,70”. This option works only if miner manages cooling, i.e. when “-tt” option is used to specify target temperature. Default value is “100”. Note: for NVIDIA cards this option is not supported.
-fanmin set minimal fan speed, in percents, for example, “-fanmin 50” will set minimal fans speed to 50%. You can also specify values for every card, for example “-fanmin 50,60,70”. This option works only if miner manages cooling, i.e. when “-tt” option is used to specify target temperature. Default value is “0”. Note: for NVIDIA cards this option is not supported.
-cclock set target GPU core clock speed, in MHz. If not specified or zero, miner will not change current clock speed. You can also specify values for every card, for example “-cclock 1000,1050,1100,0”. Unfortunately, AMD blocked underclocking for some reason, you can overclock only. Note: for NVIDIA cards this option is not supported.
-mclock set target GPU memory clock speed, in MHz. If not specified or zero, miner will not change current clock speed. You can also specify values for every card, for example “-mclock 1200,1250,1200,0”. Unfortunately, AMD blocked underclocking for some reason, you can overclock only. Note: for NVIDIA cards this option is not supported.
-powlim set power limit, from -50 to 50. If not specified, miner will not change power limit. You can also specify values for every card, for example “-powlim 20,-20,0,10”. Note: for NVIDIA cards this option is not supported.
-cvddc set target GPU core voltage, multiplied by 1000. For example, “-cvddc 1050” means 1.05V. You can also specify values for every card, for example “-cvddc 900,950,1000,970”. Supports latest AMD 4xx cards only in Windows. Note: for NVIDIA cards this option is not supported.
-mvddc set target GPU memory voltage, multiplied by 1000. For example, “-mvddc 1050” means 1.05V. You can also specify values for every card, for example “-mvddc 900,950,1000,970”. Supports latest AMD 4xx cards only in Windows. Note: for NVIDIA cards this option is not supported.
-mport remote monitoring/management port. Default value is -3333 (read-only mode), specify “-mport 0” to disable remote monitoring/management feature. Specify negative value to enable monitoring (get statistics) but disable management (restart, uploading files), for example, “-mport -3333” enables port 3333 for remote monitoring, but remote management will be blocked. You can also use your web browser to see current miner state, for example, type “localhost:3333” in web browser. Warning: use negative option value or disable remote management entirely if you think that you can be attacked via this port! By default, miner will accept connections on specified port on all network adapters, but you can select desired network interface directly, for example, “-mport 127.0.0.1:3333” opens port on localhost only.
-mpsw remote monitoring/management password. By default it is empty, so everyone can ask statistics or manage miner remotely if “-mport” option is set. You can set password for remote access (at least EthMan v3.0 is required to support passwords).
-colors enables or disables colored text in console. Default value is “1”, use “-colors 0” to disable coloring. Use 2…4 values to remove some of colors.
-v displays miner version, sample usage: “-v 1”.
-altnum alternative GPU indexing. This option does not change GPU order, but just changes GPU indexes that miner displays, it can be useful in some cases. Possible values are: 0: default GPU indexing. For example, if you specify “-di 05” to select first and last GPUs of six GPUs installed, miner will display these two selected cards as “GPU0” and “GPU1”. 1: same as “0”, but start indexes from one instead of zero. For example, if you specify “-di 05” to select first and last GPUs of six GPUs installed, miner will display these two selected cards as “GPU1” and “GPU2”. 2: alternative GPU indexing. For example, if you specify “-di 05” to select first and last GPUs of six GPUs installed, miner will display these two selected cards as “GPU0” and “GPU5”. 3: same as “2”, but start indexes from one instead of zero. For example, if you specify “-di 05” to select first and last GPUs of six GPUs installed, miner will display these two selected cards as “GPU1” and “GPU6”. Default value is “0”.


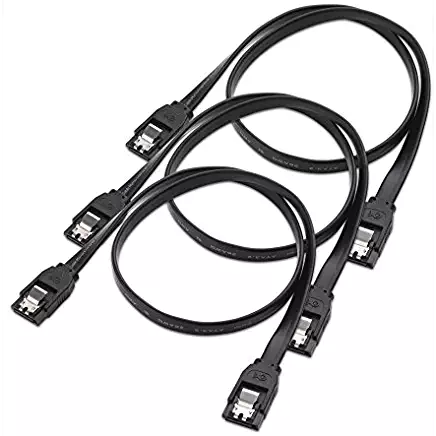 Step 5 — Connect the SSD. This is a pretty simple step as well. You should have an SSD which will serve as your hard drive. Connect this SSD to the motherboard using the