If you’re new to mining, you’ve probably encountered — at one point or another — a mention of Claymore’s Ethereum miner. It’s one of the most popular, if not the most popular, software for quickly and easily getting your mining rig up and running. It offers extensive control features, runs smoothly, and even allows on-the-fly tweaking of certain parameters without a restart.
But for those who are just now getting into this mining thing, it might be a bit confusing to get running. What’s a config file? What are parameters? How do I get this thing to make me money?
First of all, I assume you’ve found this guide after already purchasing your mining rig. If that’s the case, then feel free to read on. But if you’re still trying to decide whether or not it’s worth it to get into Ethereum mining — or mining for any cryptocurrency, for that matter — I’d encourage you to check out our Is it worth it? series. In that series, we focus on the most popular coins and give you the latest information on whether or not it’s even worth mining that coin in the first place.
So you’ve already purchased all the hardware you need for your Ethereum mining rig? Now you’re just trying to figure out the software side of things and get things running smoothly so that your electricity-to-crypto conversion machine is running smoothly? If that’s the case, and this should go without saying if you’re reading this, Claymore’s is one of your best options.
Download Claymore’s
The first thing you need to do is download Claymore’s. For anyone with any technical background, this should be the most straightforward part of the process. Head over to the Claymore’s thread on BitcoinTalk and download the latest version. You’re going to have to unzip this file to somewhere friendly on your PC. I chose my desktop, because I basically put everything on my mining rig’s desktop. Why not?
Note: If you don’t have a modern graphics card with the appropriate amount of RAM, you may as well stop reading here. Claymore’s only works with higher-end cards like the RX 470, 480 or 580 with at least 2GB of RAM (and some others), as well as the top-of-the-line cards made with Nvidia hardware.
Assuming you read our hardware guide and actually purchased the right graphics cards and other hardware, let’s continue.
Find a pool
Before you can get Claymore’s set up correctly, you need to decide on the Ethereum mining pool you’re going to use. But wait, you ask, what about solo mining where you can make the real money? Unless you have invested tens of thousands of dollars on your hardware, and you probably don’t want to solo mine. You can, technically, but it’s a slightly more complicated process and you’re taking a big risk running your rig for weeks or months and perhaps never making a single ether.
Most likely, if you’re reading this website, you want a pool. But which one should you join? And how do you join them? You’re in luck, because we’ve put together a nice list of all of the best mining pools for Ethereum. Personally, I’d recommend Ethermine or Nanopool. Both of them are highly-regarded in the community and have websites that are primarily in English.
Set up your config file
This is the part where most who are new to Claymore’s get kind of lost. To run the app correctly and have it mine Ethereum to your wallet, you need to set up/format your start.bat file (yep, it’s in that folder that you extracted earlier) to match the pool that you chose above. Setup for these pools tends to vary very slightly (some might ask for you to include your email in the config file, while others won’t, for example), but there are some basics that are true to all of them.
Here’s a quick look at what an unconfigured start.bat file looks like (to see this for yourself, download Claymore’s, extract the files, right-click start.bat, and click “Edit” to open it in a text editor). I’ll explain how to configure each part of it below.
Here’s the full string of text:
EthDcrMiner64.exe -epool us1.ethpool.org:3333 -ewal 0xD69af2A796A737A103F12d2f0BCC563a13900E6F -epsw x -dpool stratum+tcp://dcr.suprnova.cc:3252 -dwal Redhex.my -dpsw x
The .bat file is for launching the program EthDcrMiner64.exe; that’s why it’s the first piece of this. The rest of the information here follows different parameters. These are signified by the “-” and a term such as “epool”: “-epool”, for example. The string of text after this parameter is what you’re setting the parameter to.
For example, the default start.bat file is configured to run “-epool” (in this case, the Ethereum pool you want to use) as “us1.ethpool.org:3333”. As you might guess, this means that “-ewal” (the Ethereum wallet you want to mine to) is set to “0xD69af2A796A737A103F12d2f0BCC563a13900E6F”.
Obviously, to get Claymore’s running correctly, you have to configure all of these parameters for your pool and your wallet. Otherwise, if you just run the start.bat file without changing any of these parameters, you’ll just be mining for the developer of Claymore’s. Trust me, that guy doesn’t need any more Ethereum.
As I said, since there are a bunch of different pools, the configuration of this file varies slightly. But for most pools, you’re going to be filling in the address and port (the port is the :3333 part of the URL) of the pool you want, adding in your Ethereum address so that you get payouts, and specifying a worker name (usually after the wallet address).
Example 1: Ethermine
Let’s use Ethermine.org as a first example (and if you use a different pool you can check their sites to see how their configuration might slightly differ). Conveniently, that site has provided the perfect template for setting up your start.bat file. If you want to use Ethermine, simply delete everything in your start.bat, replace it with the following string, and fill in the information for your rig. (Or you can make a copy of start.bat so you don’t lose the default.)
EthDcrMiner64.exe -epool eu1.ethermine.org:4444 -ewal <Your_Ethereum_Address>.<RigName> -epsw x
Here’s how to set this up for your rig.
- Select a server that’s physically near you to reduce ping (Ethermine offers us1, us2, eu1, eu2, and asia1; I’ve chosen eu1 for this example as you can see above). If you want to change it, simply replace that part of the URL in the start.bat file you’ve just created.
- Replace <Your_Ethereum_Address> (including the brackets) with your Ethereum address starting with 0x.
- Replace <RigName> (including the brackets) with any nickname you want to give your rig. Be sure to leave the period in between the Ethereum address and the rig name.
- That’s it!
For Ethermine.org at least, that’s all you have to do to start mining Ethereum. If you want to dual-mine a different coin, there’s a bit more work to that, but this is just a basic Ethereum pool mining set up.
Example 2: Nanopool
For another example (and perhaps a more noob-friendly example), let’s take a look at Nanopool. This pool, unlike Ethermine, provides a web interface where you can fill in all the details for your configuration. It then uses this information to spit out a perfectly-configured batch file.

As you can see above, it’s as simple as choosing your OS (Windows or Linux), your GPU vendor (AMD or Nvidia), naming your rig (whatever you want it to be named), adding your email (this is used for changing settings for payouts and other things), choosing a server that’s physically near you, adding in your Ethereum address, and clicking generate. This will download a .zip file that you can extract to find your batch file. If you want this to work, of course, you have to put it in that Claymore’s directory with EthDcrMiner64.exe and run it.
But this little dialog also offers an option for a “second algorithm”: what’s that? As mentioned above, Claymore’s is capable of “dual mining”. Basically, the application can mine another coin that’s relatively easy to mine at the same time as Ethereum without heavily impacting the hashrate you get for Ethereum. Essentially, you’re stocking up in another coin that might not be worth all that much… because why not? We’ll explain that further in another guide.
Note: Another thing you might notice about Nanopool’s generated batch file is that it has the following text on the lines above the actual Claymore’s launch command:
setx GPU_FORCE_64BIT_PTR 0
setx GPU_MAX_HEAP_SIZE 100
setx GPU_USE_SYNC_OBJECTS 1
setx GPU_MAX_ALLOC_PERCENT 100
setx GPU_SINGLE_ALLOC_PERCENT 100
These commands are a good idea to include in your batch file, as they make sure your GPU is optimally configured for mining. They aren’t necessary for mining in most cases (using a 2GB RAM graphics card is one notable exception; in that case you definitely want to add these commands), but they’ll just avoid errors you might not have known you would have encountered if you didn’t include them. We’ll also explain these further in another guide.
More parameters
Once you feel like you have a familiarity with Claymore’s, you might want to dive into the “Readme!!!” text file that the program includes. Within this file you’ll find what seems like an infinite number of parameters to customize exactly how your mining rig mines. You can choose to mine at lower intensity (with lower hashrate), you can set a target temperature that you don’t want your GPUs to exceed, and plenty of other useful tweaks.
You can read the full list of Claymore’s parameters here.
Get mining!
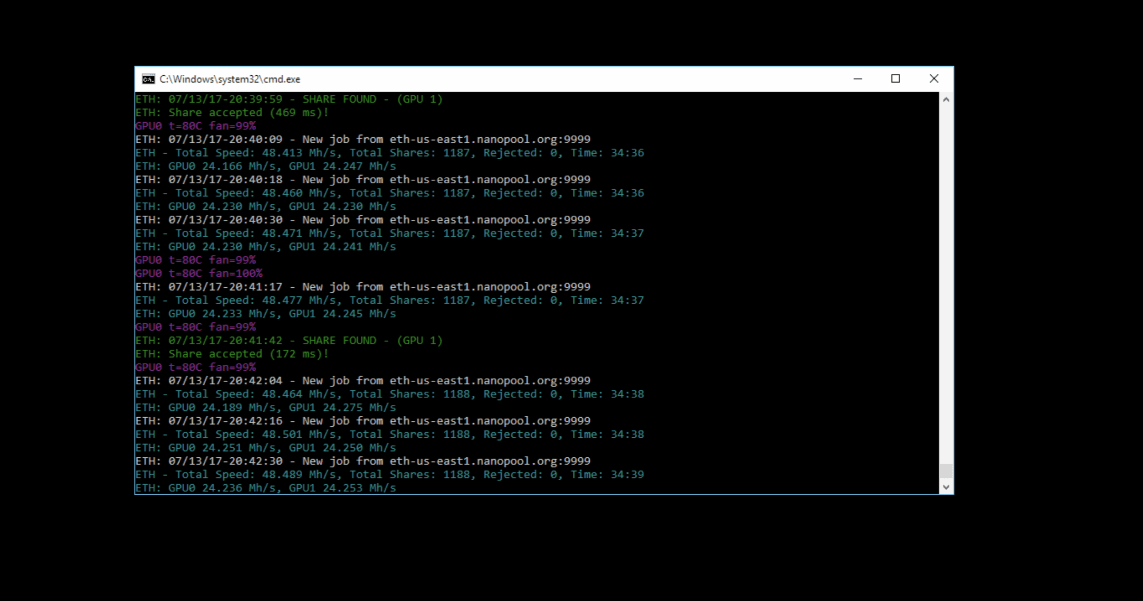
If you’ve followed through to the end of this guide, you’re more than likely ready to start mining. Simply run your batch file, load up your Ethereum address at the website of the pool of your choice, and watch as you slowly but surely earn Ethereum. We’ll explain some more details about using Claymore’s in future guides, but this should be enough to get started.