
Exodus is one of the most popular cryptocurrency wallets, and for good reason. It’s user-friendly, accessible, free, and supports a wide breadth of crypto assets. If you’re a beginner with cryptocurrency, it makes sense that it would be at the top of your list. With that in mind, here’s how to get started using the Exodus wallet if you need a little more help.
Table of Contents
Install and set up Exodus wallet on Mac and PC
No matter how much effort top exchanges put into making sure your funds are secure, a wallet is the safest place to keep your crypto. Setting up a wallet for the first time can be intimidating but rest assured, Exodus asks for less information than just about any modern service you use.
Exodus is a great wallet to start with because of its polished interface, wide variety of supported coins, and speed. There is even an exchange feature so you don’t have to deal with the time and fees of withdrawing to an exchange and redepositing.
Without even having to create an account, you’ll be able to deposit your crypto in seconds.
- Navigate to exodus.io. If you are on the official website, the browser should have a closed lock next to the web address.
- Click “download” on the top right side of the page.
- Install the application as you normally would. On Windows, you simply click on the downloaded file and it will install. On Mac, drag the file into the Applications folder as usual. You can download this program for Linux as well.
- Exodus does not require an account to be made. As soon as the program is installed, you will be able to manage your crypto assets.
After setting up, we recommend you immediately set up the security features of the application. The entire point of a wallet is to have added security, and while your assets are no longer on an exchange, anyone can open your the application from your computer and send assets without a password.
How to enable and disable cryptocurrency assets in Exodus
After your Exodus wallet is installed and secured, it’s time to deposit your assets, but first you need to enable them. Exodus supports over 100 coins, but they’re not all instantly available. Here’s how to enable assets that are not already in the wallet tab by checking some settings.
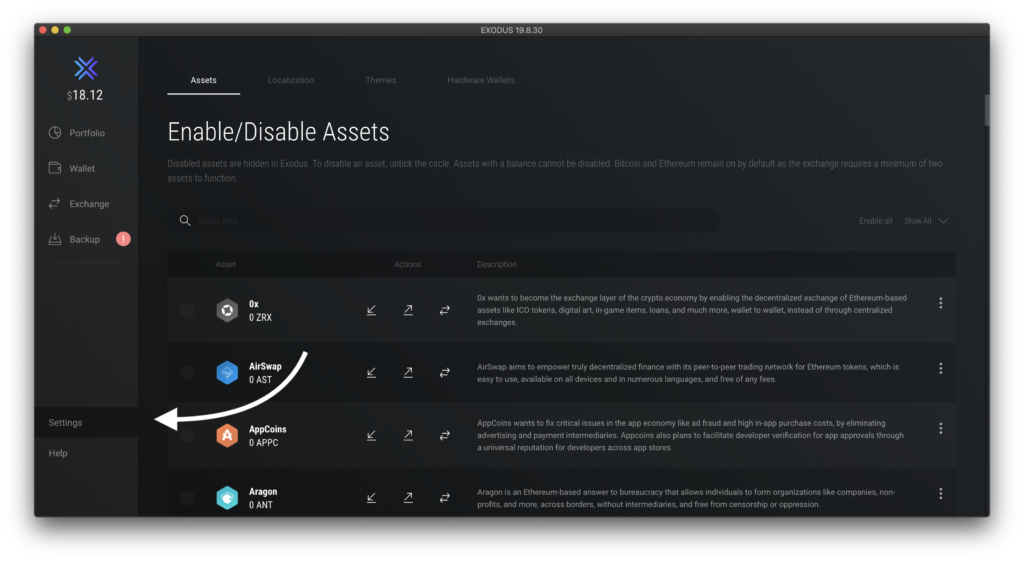
- Open the Exodus app and click settings on the bottom left hand corner.
- Clicking settings should automatically bring you to the “Assets” tab. If it does not, then you will be able to find it in the row of categories at the top of the app.
- Below where it says “Enable/Disable Assets” there is a text box that says “Search Here…”
- Enter the name of the coin you would like to deposit. For example: “Tezos”
- Click the empty circle next to the desired asset, which will then turn into a checkmark to show that it’s enabled.
When you have enabled your asset, it will show up in the “Wallet” tab on the main screen of the app. From there you will be able to deposit and withdraw to your blockchain address.
Another benefit of this enabling/disabling assets feature is that it gives the ability to clean up your wallet. By default, Exodus lists about 14 coins on their wallet tab. If you would like to only show the ones you are interested and not sift through the list, just disable them by using the same method.
Manage & add Exodus funds, send them elsewhere
Along with managing funds, the primary function of your Exodus wallet is to be a safer place to store assets than an exchange.
Sending crypto is where you can experience the magic of the blockchain or the first time. You will be sending digital value without the need for a middle man.
The only knowledge you need before depositing and withdrawing is that your crypto is stored on an address. Having access to that address will allow you to send the contents to another address on the same network. Locate the asset you wish to transfer in order to get started.
How to add your coins
- On whichever exchange or wallet you’re holding your crypto, find a button that says “withdraw” or “send.”
- Decide how much of the asset you would like to send to the wallet.
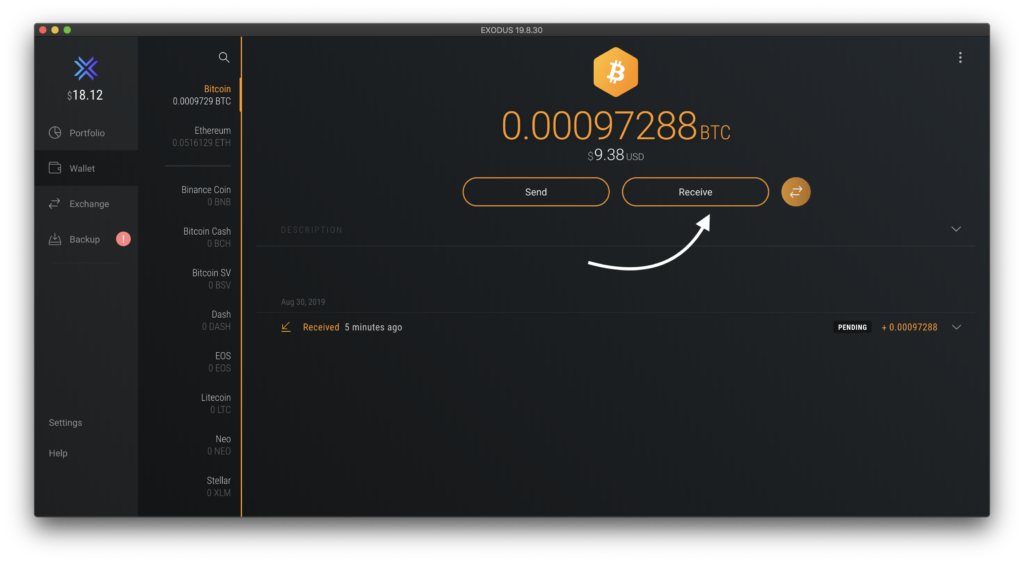
- Scan the QR code with your mobile device or carefully copy and paste the Exodus wallet address into your destination. You can find your Exodus wallet address by going into the “Wallet” section and clicking “Receive”
- Once you have confirmed your withdrawal, all that’s left is to wait until it is accepted on the blockchain. My withdrawal from Cash App to Exodus took less than 5 minutes, but it varies depending on many factors
How to send assets elsewhere
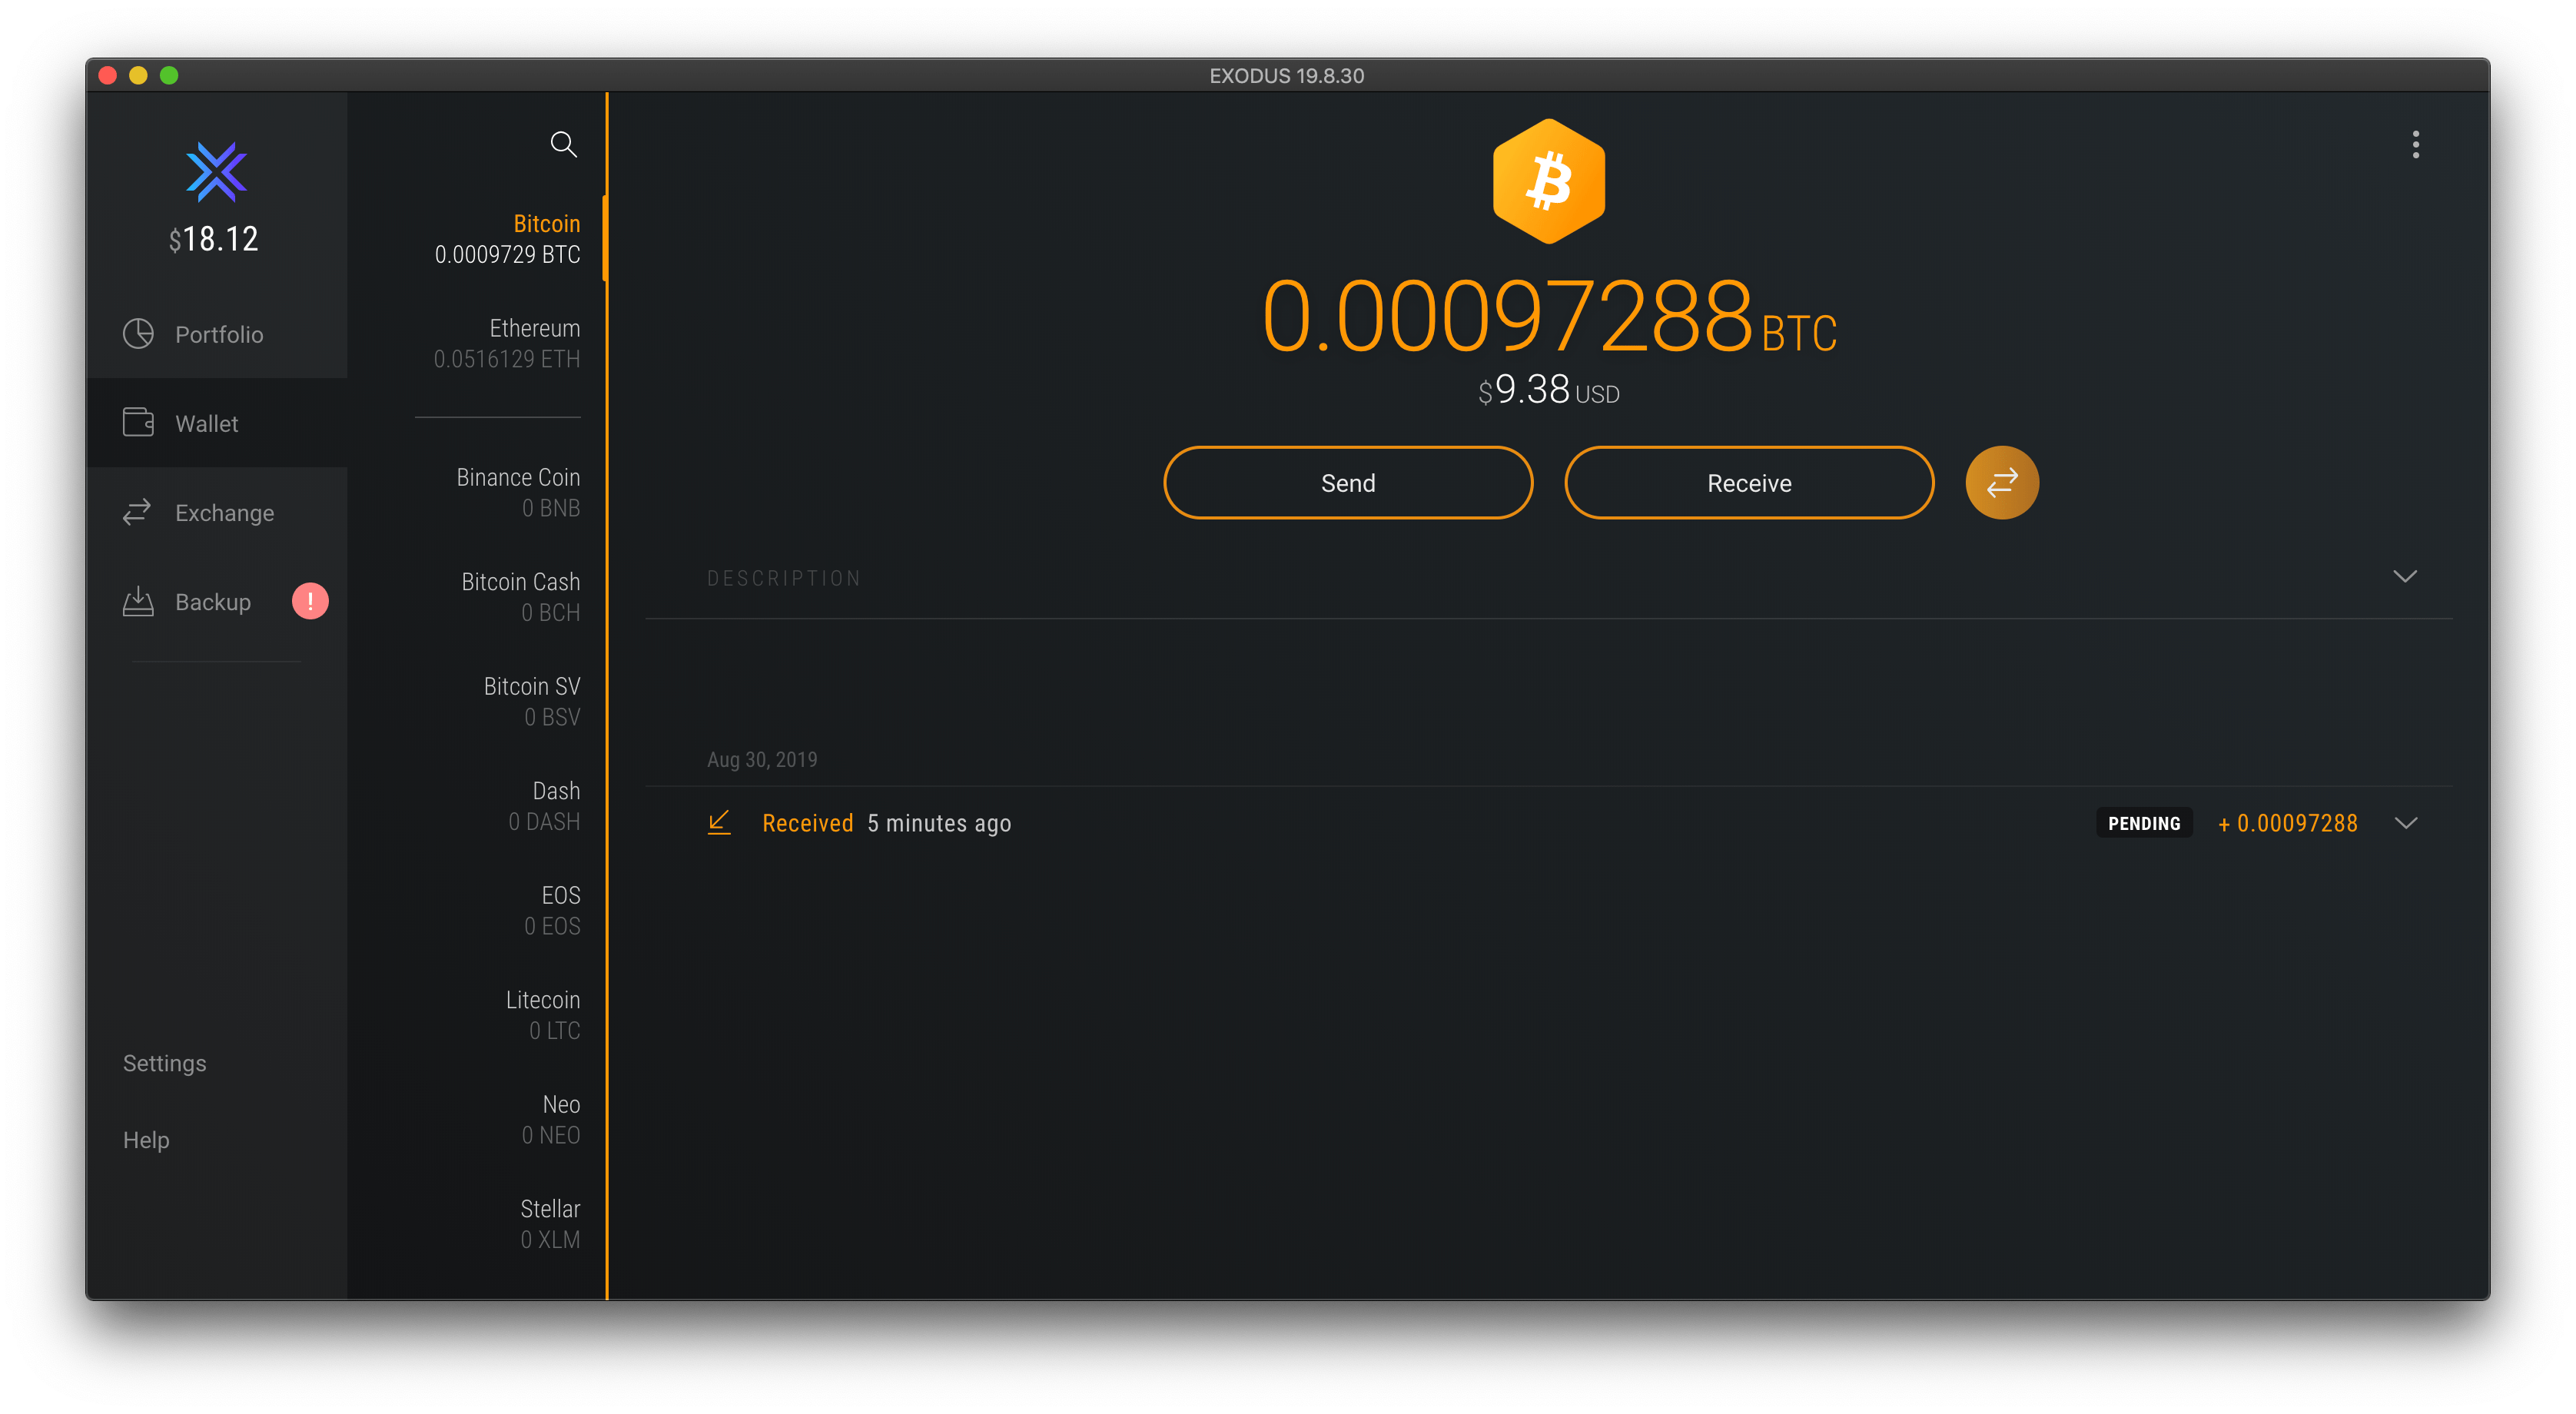
- In Exodus, click the “Wallet” tab on the left side of the app.
- Whichever crypto wallets you have value stored in should be on the top of the list of wallets. Click on the coin you are trying to withdraw.
- Click on “Send” in the middle of the screen, and you’ll be prompted to enter the address you would like to send to.
- Find that address on the platform of your destination. For instance, on Coinbase you will click on the “Accounts” tab, then choose whichever wallet matches the asset you are sending, and press “Receive.”
- Once you find the “Receive,” or “Deposit” button, either copy the address exactly or use your camera to scan the QR code if you are using a mobile device. If you choose to copy the address, make sure everything is accurate with no extra spaces, otherwise you will lose and never be able to recover what you send.
- After you press “Send,” Exodus will bring up another window displaying the information you entered to make sure that it is correct. If everything looks right, press “Send” once again.
Note: Since copying the long and random blockchain addresses can be a delicate process, most sites include their own “copy” button near the address. Always use their copy feature rather than highlighting the text since there is less room for error.
Transaction confirmations usually come with an e-mail from the destination. After the first network confirmation, the funds may still be pending. Coinbase requires up to 6 network confirmations before the Bitcoin is available to trade. Different coins have different processing times, but on an average day the process won’t take more than 30 minutes.
How to set up a password and backup to secure your wallet
After Exodus is installed on your computer, the most important thing to do is to set up security features — including a password and backup for your wallet. You’re able to deposit and withdraw without doing so, but if anyone was to access your computer they would be able to send your money anywhere.
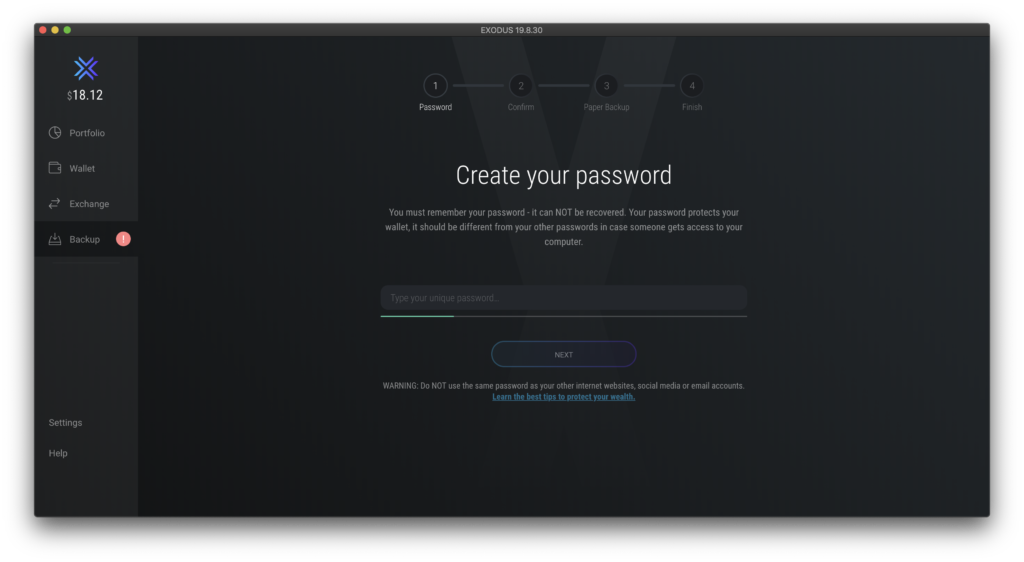
There are two ways to back up your wallet on Exodus. Password protection allows users to have security when opening the program. Without the password, anyone who opens your program will have full access to every feature of the wallet.
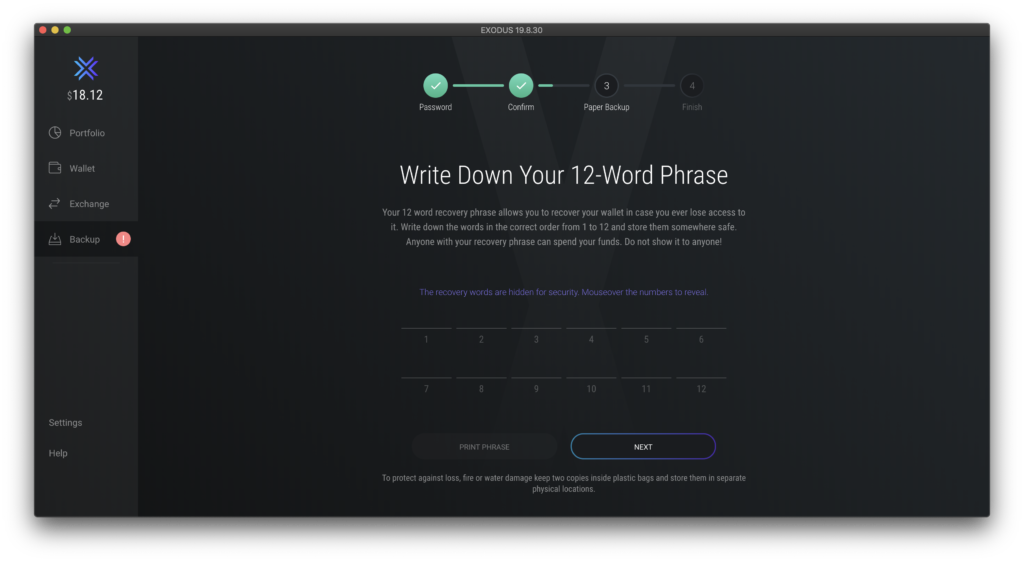
Second, it’s smart to create a 12-word recovery phrase that will allow you to access the wallet from any computer or mobile device in the future. A recovery phrase allows users to regain access to the wallet from another location, or in the case that it is lost or uninstalled.
Both security features are the reason you are setting up a wallet in the first place. Here are the steps to activate them:
- Find the “Backup” tab under “Exchange” on the left side of the program.
- Once you’ve clicked on “Backup” the program will ask you to create and confirm a password. The password will allow access to the your copy of Exodus as long as the program is unaltered.
- After your password is created, Exodus will ask you to write down twelve words that can be used to access your wallet from anywhere. This also means that if somebody finds these 12 words, they will have access to all of your funds.
- Choose whether you would like to keep a digital or physical copy of these twelve words. Physical copies are more likely to be lost or damaged while digital copies are more easily accessible to hackers or people on your computer.
- Make sure to keep track of your copies as you can never recover them unless you put your password into the original Exodus that you used to receive the keywords.
Congratulations! Your wallet is secured. The only thing you could do at this point to ensure even greater security is purchase a Trezor Hardware wallet. For now, Trezor is the only hardware wallet that Exodus is compatible with.